11 KiB
Install OpenVINO™ Runtime on Linux from an Archive File
With the OpenVINO™ 2022.3 release, you can download and use archive files to install OpenVINO Runtime. The archive files contain pre-built binaries and library files needed for OpenVINO Runtime, as well as code samples.
Installing OpenVINO Runtime from archive files is recommended for C++ developers. If you are working with Python, the PyPI package has everything needed for Python development and deployment on CPU and GPUs. See the Install OpenVINO from PyPI page for instructions on how to install OpenVINO Runtime for Python using PyPI.
NOTE: Since the OpenVINO™ 2022.1 release, the following development tools: Model Optimizer, Post-Training Optimization Tool, Model Downloader and other Open Model Zoo tools, Accuracy Checker, and Annotation Converter can be installed via pypi.org only.
See the Release Notes for more information on updates in the latest release.
@sphinxdirective .. tab:: System Requirements
| Full requirement listing is available in:
| System Requirements Page <https://www.intel.com/content/www/us/en/developer/tools/openvino-toolkit/system-requirements.html>_
.. tab:: Processor Notes
Processor graphics are not included in all processors.
See Product Specifications_ for information about your processor.
.. _Product Specifications: https://ark.intel.com/
.. tab:: Software
CMake 3.13 or higher, 64-bit <https://cmake.org/download/>_- GCC 7.5.0 (for Ubuntu 18.04) or GCC 9.3.0 (for Ubuntu 20.04)
Python 3.7 - 3.10, 64-bit <https://www.python.org/downloads/>_
@endsphinxdirective
Installing OpenVINO Runtime
Step 1: Download and Install the OpenVINO Core Components
@sphinxdirective
-
Open a command prompt terminal window. You can use the keyboard shortcut: Ctrl+Alt+T
-
Create the
/opt/intelfolder for OpenVINO by using the following command. If the folder already exists, skip this step... code-block:: sh
sudo mkdir /opt/intel
.. note:: The
/opt/intelpath is the recommended folder path for administrators or root users. If you prefer to install OpenVINO in regular userspace, the recommended path is/home/<USER>/intel. You may use a different path if desired. -
Browse to the current user's
Downloadsfolder:.. code-block:: sh
cd <user_home>/Downloads
-
Download the
OpenVINO Runtime archive file for your system <https://storage.openvinotoolkit.org/repositories/openvino/packages/2022.3/linux/>_, extract the files, rename the extracted folder and move it to the desired path:.. tab:: Ubuntu 20.04
.. code-block:: sh
  curl -L https://storage.openvinotoolkit.org/repositories/openvino/packages/2022.3/linux/l_openvino_toolkit_ubuntu20_2022.3.0.9052.9752fafe8eb_x86_64.tgz --output openvino_2022.3.0.tgz
  tar -xf openvino_2022.3.0.tgz
  sudo mv l_openvino_toolkit_ubuntu20_2022.3.0.9052.9752fafe8eb_x86_64 /opt/intel/openvino_2022.3.0
.. tab:: Ubuntu 18.04
.. code-block:: sh
  curl -L https://storage.openvinotoolkit.org/repositories/openvino/packages/2022.3/linux/l_openvino_toolkit_ubuntu18_2022.3.0.9052.9752fafe8eb_x86_64.tgz --output openvino_2022.3.0.tgz
  tar -xf openvino_2022.3.0.tgz
  sudo mv l_openvino_toolkit_ubuntu18_2022.3.0.9052.9752fafe8eb_x86_64 /opt/intel/openvino_2022.3.0
.. tab:: RHEL 8
.. code-block:: sh
  curl -L https://storage.openvinotoolkit.org/repositories/openvino/packages/2022.3/linux/l_openvino_toolkit_rhel8_2022.3.0.9052.9752fafe8eb_x86_64.tgz --output openvino_2022.3.0.tgz
  tar -xf openvino_2022.3.0.tgz
  sudo mv l_openvino_toolkit_rhel8_2022.3.0.9052.9752fafe8eb_x86_64 /opt/intel/openvino_2022.3.0
.. tab:: CentOS 7
.. code-block:: sh
curl -L https://storage.openvinotoolkit.org/repositories/openvino/packages/2022.3/linux/l_openvino_toolkit_centos7_2022.3.0.9052.9752fafe8eb_x86_64.tgz --output openvino_2022.3.0.tgz tar -xf openvino_2022.3.0.tgz sudo mv l_openvino_toolkit_centos7_2022.3.0.9052.9752fafe8eb_x86_64 /opt/intel/openvino_2022.3.0 -
Install required system dependencies on Linux. To do this, OpenVINO provides a script in the extracted installation directory. Run the following command:
.. code-block:: sh
cd /opt/intel/openvino_2022.3.0/ sudo -E ./install_dependencies/install_openvino_dependencies.sh
-
For simplicity, it is useful to create a symbolic link as below:
.. code-block:: sh
sudo ln -s openvino_2022.3.0 openvino_2022
.. note:: If you have already installed a previous release of OpenVINO 2022, a symbolic link to the
openvino_2022folder may already exist. Unlink the previous link withsudo unlink openvino_2022, and then re-run the command above.
@endsphinxdirective
Congratulations, you finished the installation! The /opt/intel/openvino_2022 folder now contains the core components for OpenVINO. If you used a different path in Step 2, for example, /home/<USER>/Intel/, OpenVINO is then installed in /home/<USER>/Intel/openvino_2022. The path to the openvino_2022 directory is also referred as <INSTALL_DIR> throughout the OpenVINO documentation.
Step 2: Configure the Environment
You must update several environment variables before you can compile and run OpenVINO applications. Open a terminal window and run the setupvars.sh script as shown below to temporarily set your environment variables. If your <INSTALL_DIR> is not /opt/intel/openvino_2022, use the correct one instead.
source /opt/intel/openvino_2022/setupvars.sh
If you have more than one OpenVINO version on your machine, you can easily switch its version by sourcing the setupvars.sh of your choice.
NOTE: The above command must be re-run every time you start a new terminal session. To set up Linux to automatically run the command every time a new terminal is opened, open
~/.bashrcin your favorite editor and addsource /opt/intel/openvino_2022/setupvars.shafter the last line. Next time when you open a terminal, you will see[setupvars.sh] OpenVINO™ environment initialized. Changing.bashrcis not recommended when you have multiple OpenVINO versions on your machine and want to switch among them.
The environment variables are set. Continue to the next section if you want to download any additional components.
Step 3 (Optional): Install Additional Components
OpenVINO Development Tools is a set of utilities for working with OpenVINO and OpenVINO models. It provides tools like Model Optimizer, Benchmark Tool, Post-Training Optimization Tool, and Open Model Zoo Downloader. If you install OpenVINO Runtime using archive files, OpenVINO Development Tools must be installed separately.
See the Install OpenVINO Development Tools page for step-by-step installation instructions.
OpenCV is necessary to run demos from Open Model Zoo (OMZ). Some OpenVINO samples can also extend their capabilities when compiled with OpenCV as a dependency. To install OpenCV for OpenVINO, see the instructions on GitHub.
Step 4 (Optional): Configure Inference on Non-CPU Devices
OpenVINO Runtime has a plugin architecture that enables you to run inference on multiple devices without rewriting your code. Supported devices include integrated GPUs, discrete GPUs and GNAs. See the instructions below to set up OpenVINO on these devices.
@sphinxdirective .. tab:: GPU
To enable the toolkit components to use processor graphics (GPU) on your system, follow the steps in :ref:GPU Setup Guide <gpu guide>.
.. tab:: GNA
To enable the toolkit components to use Intel® Gaussian & Neural Accelerator (GNA) on your system, follow the steps in :ref:GNA Setup Guide <gna guide>.
@endsphinxdirective
What's Next?
Now that you've installed OpenVINO Runtime, you're ready to run your own machine learning applications! Learn more about how to integrate a model in OpenVINO applications by trying out the following tutorials.
@sphinxdirective .. tab:: Get started with Python
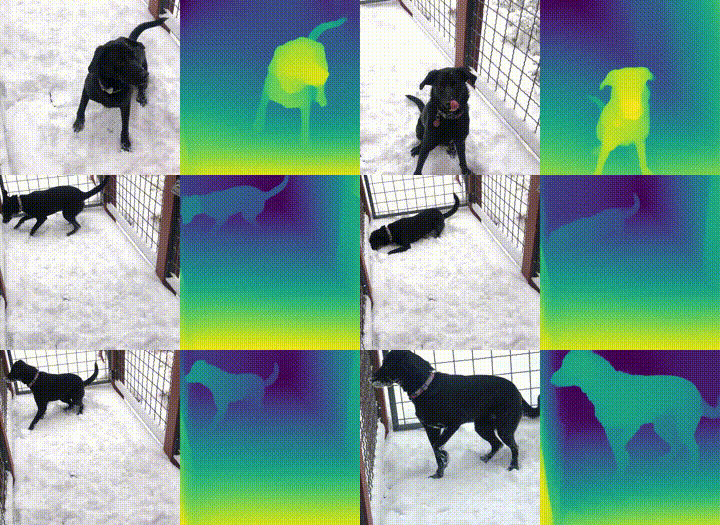
Try the Python Quick Start Example <https://docs.openvino.ai/nightly/notebooks/201-vision-monodepth-with-output.html>_ to estimate depth in a scene using an OpenVINO monodepth model in a Jupyter Notebook inside your web browser.
.. image:: https://user-images.githubusercontent.com/15709723/127752390-f6aa371f-31b5-4846-84b9-18dd4f662406.gif :width: 400
Visit the :ref:Tutorials <notebook tutorials> page for more Jupyter Notebooks to get you started with OpenVINO, such as:
OpenVINO Python API Tutorial <https://docs.openvino.ai/nightly/notebooks/002-openvino-api-with-output.html>_Basic image classification program with Hello Image Classification <https://docs.openvino.ai/nightly/notebooks/001-hello-world-with-output.html>_Convert a PyTorch model and use it for image background removal <https://docs.openvino.ai/nightly/notebooks/205-vision-background-removal-with-output.html>_
.. tab:: Get started with C++
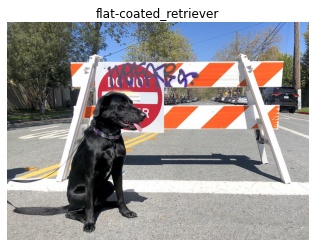
Try the C++ Quick Start Example <openvino_docs_get_started_get_started_demos.html>_ for step-by-step instructions on building and running a basic image classification C++ application.
.. image:: https://user-images.githubusercontent.com/36741649/127170593-86976dc3-e5e4-40be-b0a6-206379cd7df5.jpg :width: 400
Visit the :ref:Samples <code samples> page for other C++ example applications to get you started with OpenVINO, such as:
Basic object detection with the Hello Reshape SSD C++ sample <openvino_inference_engine_samples_hello_reshape_ssd_README.html>_Automatic speech recognition C++ sample <openvino_inference_engine_samples_speech_sample_README.html>_
@endsphinxdirective
Uninstalling the Intel® Distribution of OpenVINO™ Toolkit
To uninstall the toolkit, follow the steps on the Uninstalling page.
Additional Resources
@sphinxdirective
- :ref:
Troubleshooting Guide for OpenVINO Installation & Configuration <troubleshooting guide for install> - Converting models for use with OpenVINO™: :ref:
Model Optimizer User Guide <deep learning model optimizer> - Writing your own OpenVINO™ applications: :ref:
OpenVINO™ Runtime User Guide <deep learning openvino runtime> - Sample applications: :ref:
OpenVINO™ Toolkit Samples Overview <code samples> - Pre-trained deep learning models: :ref:
Overview of OpenVINO™ Toolkit Pre-Trained Models <model zoo> - IoT libraries and code samples in the GitHub repository:
Intel® IoT Developer Kit_
.. _Intel® IoT Developer Kit: https://github.com/intel-iot-devkit
@endsphinxdirective